


This gluten-free chocolate chip brownie cheesecake is a dessert lover’s dream! A rich brownie crust is topped with a silky, cheesecake layer speckled throughout with mini chocolate chips. It's then topped off with more mini chocolate chips and fresh strawberries for a truly out-of-this-world, decadent, and delicious cheesecake! Perfect for the holidays or any special occasion!

No words. Just eyes closed and a smile on their face. That's what happens when friends and family take their first bite of this dreeeamy Chocolate Chip Brownie Cheesecake.
This is my go-to dessert when I want to pull out all the stops and impress the socks off of people. This wow-worthy cheesecake has made numerous appearances at birthday parties, Christmas Eve and Christmas Day family gatherings, Friendsgiving celebrations, and the occasional just-cuz-I'm-craving-cheesecake moment.
It's gluten-free and EVERYONE will love it. Unless they don't like chocolate, and I've got nothing to say about that except, sorry.
Jump to:

🌟 Why You'll Love This Recipe
The top half is creamy, silky cheesecake studded with mini chocolate chips. The bottom half is rich, fudgy brownie. What's not to love?
- Perfect dessert for a crowd. Cheesecake is a naturally rich and decadent dessert so a little slice can go a long way toward satisfying that post-dinner sweet tooth. This cheesecake can easily serve 12 making it perfect for a large holiday gathering or birthday party.
- Cheesecake requires an overnight chill in the fridge which means you're freed up to focus on other tasks the day you'll be serving it. When all the prep and cooking that goes into hosting a dinner gathering or party is accomplished, it's a pretty awesome feeling to just be able to pull out a beautiful dessert straight from the fridge and have it ready to serve.
- It freezes well. If by some odd chance you have cheesecake leftovers or you just want to make sure you always have some slices on hand for when dessert cravings strike, this is one dessert that stores well in the freezer. I'll give you some helpful tips on how to freeze this cheesecake so read on!
- Just 7 ingredients. I love recipes with minimal ingredients that are easy to find in grocery stores. If you do have any trouble sourcing them at the store, I'll link to the ingredients I used in the recipe card so you can purchase them through Amazon.
🛒 Ingredients & Suggestions

- Bob's Red Mill Gluten-Free Brownie Mix: There's no need to create a gluten-free brownie crust from scratch when Bob's Red Mill has an out-of-this-world gluten-free brownie mix already! If you're not familiar with Bob's Red Mill be sure to check them out! Their products can be found just about everywhere in the United States, including on Amazon. Bob's Red Mill Gluten-Free Brownie Mix produces a wonderful and deliciously rich, fudgy chocolate brownie layer for this cheesecake. I can't vouch for other gluten-free brownie mix brands so if you decide to use a different mix for your brownie layer it's at your own risk!
- Cream Cheese: Original, full-fat cream cheese is how we're rolling. Make sure the cream cheese is room temp before using.
- Sweetened Condensed Milk: NOT evaporated milk. Anyone else ever accidentally grab the wrong can at the store?
- Mini Chocolate Chips: I don't recommend regular sized chocolate chips, they're just a little too large for this cheesecake. The mini chips, however, add a perfect little accent of chocolate to the cheesecake layer without dominating the texture.
- Coconut Oil: Used to make that decadent brownie layer. It doesn't end up tasting coconutty so if you had that worry, be at ease.
For a full list of ingredients and quantities see the recipe card at the end of this post.
🔪 Step-By-Step Instructions

Step 1: Line a springform pan on its side up against one edge of the parchment paper. Mark a point approximately equal to the height of the pan.
Step 2: Fold the parchment paper over at the mark making a crease. Cut along the line of the crease. Using the cut strip of parchment paper as a guide, repeat to cut a second piece the same size.

Step 3: Remove the base of the springform pan and invert it (this will help make it easier to slide the cheesecake off of it after it has baked and chilled). Grease the base and sides of the cake tin with coconut oil.
Step 4: Line the inverted base with parchment paper. Secure the parchment-covered inverted base by sliding the edge into place and locking the sides.

Step 5: Place the two strips of parchment paper that you cut earlier along the inside sides of the tin. You'll also want to trim the parchment paper around the base, but leaving enough around the edge to be able to easily grab a hold of it when you remove the cake from the pan base later.
Step 6: Let's make the brownie layer! In a large mixing bowl, add the gluten-free brownie mix, three eggs, and melted coconut oil.

Step 7: Mix the brownie ingredients well until fully combined.
Step 8: Pour the brownie batter into the prepared springform pan and spread evenly with a spatula. Bake at 350°F for 35 minutes or until set.

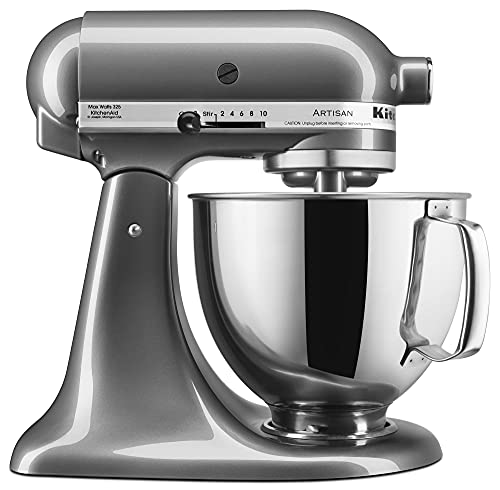
Step 9: While the brownie layer is baking let's make the chocolate chip cheesecake layer! In the bowl of an electric stand mixer fitted with the paddle attachment or beaters, beat the cream cheese and sweetened condensed milk on medium speed until just smooth. Scrape the bottom and sides of the bowl to be sure the mixture is evenly combined.
Step 10: Add three eggs and vanilla; mixing at low speed until just combined, scraping the bowl as necessary.

Step 11: Remove the bowl from the stand mixer and gently stir in the mini chocolate chips.
Step 12: Once the brownie layer has finished baking reduce the oven temperature to 300°F degrees. Wrap the bottom and sides in heavy-duty aluminum foil in preparation for baking the cheesecake in a water bath. Pour the cheesecake batter over the top of the brownie layer.

Step 13: Prepare a water bath for the cheesecake (see instructions further down). Bake the cheesecake for 1 hour or until the center is set. DO NOT open the oven door while the cheesecake is baking. This could cause the cheesecake to collapse or to form cracks on the surface from the sudden change in temperature from opening the oven door. Once the cheesecake has finished baking, turn off the oven and allow cheesecake to gradually cool in the oven for 1 hour, with the oven door slightly cracked open.
Step 14: Once cooled, sprinkle the top of the cheesecake with more mini chocolate chips! Allow the cheesecake to chill thoroughly in the refrigerator for 4-6 hours or preferably overnight prior to serving. Once thoroughly chilled remove the sides of the springform pan and serve with fresh strawberries!

🛁 How to Make a Water Bath
Making a water bath for your cheesecake might sound daunting, but trust me, it's really not. We're simply placing the springform pan in a roasting pan, filling the roasting pan with 1-inch of boiling water, and baking the cake.
The steam from the hot water bath helps to prevent cracks from forming on the surface of the cheesecake while also ensuring a smooth and creamy texture by acting as a buffer from the heat.
Is it possible to make a cheesecake without a water bath? Definitely! You'll want to make sure all of your ingredients are at room temp and you will need to be very careful with how you combine your ingredients, mixing them slowly so as not to over mix or aerate them. BUT if you're aiming for a show-stopping cheesecake with excellent texture, a level surface, and lovely light, golden hue around the outer edge, a water bath is a must.
Water bath hacks to make this worthwhile process super simple
- Boil the water in a kettle. It’s a lot easier to pour the boiling water into the pan without spilling if you are pouring from a kettle.
- Place the roasting pan with the springform pan in the oven first prior to adding the hot water. Trying to carry a roasting pan with hot water and a cheesecake filled springform pan is not only heavy but is incredibly awkward. We also don't want to risk sloshing the hot water onto the cheesecake or ourselves. So instead, add the boiling water to the roasting pan after you have situated it on the oven rack and you'll be golden.

❄️ How to Freeze Cheesecake
Cheesecake freezes like a charm which means this tasty dessert can just hang out in the freezer until your sweet tooth comes calling. Here are some basic steps for freezing your cheesecake:
- Allow the cheesecake to cool completely before freezing. After the cheesecake has baked and is ready to be removed from the oven set it on the counter to cool completely. Once cooled, place it in the refrigerator to chill for at least 4 hours but preferably overnight.
- Slice it or leave it whole. Once the cheesecake has chilled remove the outer rim from the springform pan. If you'd like, cut the cheesecake into portions or simply leave it whole. The cheesecake can remain on the springform pan base or grab the edge of the parchment paper underneath the cheesecake to carefully slide it onto a round cardboard base.
- Wrap it well in plastic wrap, then foil. The less air comes into contact with the cheesecake, the longer it will last in the freezer. If the cheesecake is sliced into pieces, be sure to wrap each individual slice with plastic wrap and aluminum foil.
- Freeze for up to 1 month. Any longer than that risks possible freezer burn or changes to the taste and texture of the cheesecake. Thaw the cheesecake in the refrigerator overnight prior to serving.
- Do not freeze cheesecake with any toppings. Garnish the cheesecake with fresh strawberries or any other toppings you'd like when you're ready to serve. Freezing the mini chocolate chips on top is fine though.
👩🍳 7 Tips for a Perfect Cheesecake
Here's a quick review of my top tips for making this cheesecake successfully every single time.
- Make sure the cream cheese is at room temperature prior to mixing the cheesecake batter to help avoid a lumpy texture.
- Don't over-mix the cheesecake batter.
- Bake the cheesecake in a water bath to prevent surface cracks and uneven texture.
- Don't open the oven door while the cheesecake is baking.
- Once the cheesecake has finished baking, turn the oven off, crack the oven door slightly, and allow the cheesecake to cool in the oven for 1 hour.
- After you remove the cheesecake form the oven, allow it to cool completely at room temperature.
- Chill the cheesecake in the refrigerator prior to serving for at least 4-6 hours, but preferably overnight.

💭 Frequently Asked Questions
Many sources say that a well-wrapped cheesecake can keep well in a freezer for up to 1 month. Others say that it can do just fine for up to 3 months. My cheesecake is devoured by friends and family long before that so I can't personally say from experience nor does my sweet tooth have the willpower to test it out.
The mini chocolate chips on top are fine to freeze with the cheesecake but if you'd like to add the sliced strawberries or any other kind of topping like a sauce or another type of fruit, save those garnishes for when you're ready to serve.
Cheesecakes love humid environments which is what is created when a water bath is used. The steam from the water bath helps the cheesecake to lift up slowly and evenly while it's baking which in turn reduces the risk of cracks from forming on the surface, prevents the cheesecake from sinking back down as it cools, and helps to avoid drying out or overbaking the cheesecake.

Don't be intimidated by this cheesecake. It might feel like there are a lot of do's and don'ts to making this cheesecake successfully but once you start making it I think you'll find it's pretty easy.
This cheesecake recipe was originally inspired by a couple of students I knew many years ago during college when I was working a summer job and living in a large house with about 100 other college kiddos. While all of us students were out working our summer jobs during the day there were two students who would stay behind to grocery shop, prepare, and cook dinner for everyone.
Yep...100 students, 2 student cooks, a TON of food, and dessert EVERY.SINGLE.NIGHT.
Ummm yes, some major dessert habits were formed that summer that took a while to reset when summer ended and life returned back to normal.
But here's the moral of the story, if those two college kids were able to make cheesecake for 100 people, you can totally make this cheesecake too. And whoever you share it with will be amazed and is going to
✨ More Tasty Dessert Recipes!


💕 Follow Along!
Subscribe to my newsletter and follow along on Instagram, Pinterest, and Facebook for more tasty recipe inspiration!
Did You Make This Recipe?
If so, I’d love to hear about it! Leave a comment and a star rating below! I greatly appreciate your feedback and it is also so helpful for other PMST readers who are thinking about making the recipe. Remember to snap a photo and tag @passmesometasty on Instagram so I can see!
📖 Recipe

Chocolate Chip Brownie Cheesecake
- Prep Time: 20 mins
- Cook Time: 1 hour 35 mins
- Total Time: 1 hour 55 minutes
- Yield: 12 servings
Description
This gluten-free Chocolate Chip Brownie Cheesecake boasts a rich brownie crust with a silky, cheesecake layer speckled throughout with mini chocolate chips. Top it with fresh berries for a truly out of this world, decadent, and delicious cheesecake!
Ingredients
- 21 ounces (1 package) Bobs Red Mill Gluten-Free Brownie Mix
- ½ cup coconut oil, melted
- 6 eggs
- 24 ounces (three 8 oz blocks) full-fat cream cheese, at room temperature
- 14 ounces sweetened condensed milk (DO NOT use evaporated milk)
- 2 teaspoon vanilla extract
- ½ cup mini chocolate chips (plus extra for sprinkling on top of the finished cheesecake)
- fresh, sliced strawberries (optional for topping)
Instructions
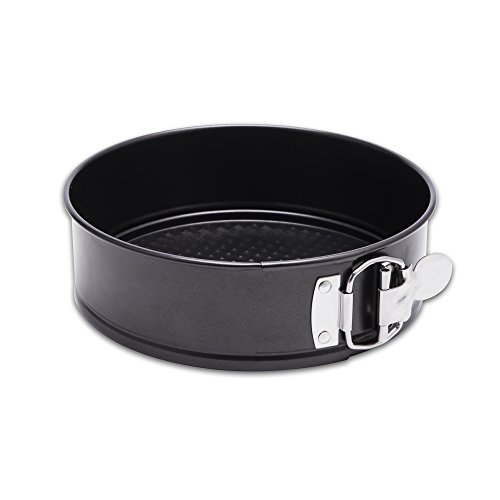
- Prep: Adjust the oven rack to the lower-middle position and preheat the oven to 350°F. Grease the bottom and sides of a 9-inch springform pan (I used coconut oil). Then line the base and sides of the pan with parchment paper.
- Make the brownie batter: In a large mixing bowl combine the brownie mix, 3 eggs, and melted coconut oil. Pour the brownie batter into the prepared springform pan and spread evenly with a spatula.
- Bake the brownie layer: Bake 35 minutes or until set. Remove from the oven and place the hot pan on a large piece of heavy-duty aluminum foil. Wrap foil around the pan covering both the underside and extending up along the sides in preparation for the water bath in Step 5. Reduce the oven temperature to 300°F.
- Make the cheesecake layer: In the bowl of an electric stand mixer fitted with the paddle attachment or beaters, beat the cream cheese and sweetened condensed milk on medium speed until just smooth. Scrape the bottom and sides of the bowl to be sure the mixture is evenly combined. Add the remaining 3 eggs and vanilla; mixing on low speed until just combined, scraping the bowl as necessary. Remove the bowl from the stand mixer and gently stir in the mini chocolate chips. Pour the cheesecake batter into the springform pan over the top of the baked brownie layer.
- Make a water bath: Set a kettle of water to boil. You'll need to fill a large pan (I use a roasting pan) with about 1 inch of hot water for the water bath, so make sure you boil enough water. I use an entire kettle of hot water. Place the springform pan with the cheesecake inside the large pan and then place them both in the oven. Carefully pour the boiling water into the large pan so that it comes up about 1 inch along the side of the springform pan.
- Bake: Bake 1 hour or until center is set. DO NOT open the oven door while the cheesecake is baking inside. This could cause your cheesecake to collapse or to form cracks on the surface due to the sudden change in temperature.
- Cool: Once the cheesecake has finished baking, turn off the oven and allow the cheesecake to gradually cool in the oven for 1 hour, with the oven door slightly cracked open.
- Chill: Once cooled remove from the oven, sprinkle the top of cheesecake with additional mini chocolate chips, and place in the refrigerator to chill thoroughly for 4-6 hours or preferably overnight.
- Serve: Remove the sides of the springform pan. Serve the cheesecake directly from the base of the springform pan or transfer it to a cake plate by using a knife to loosen the chilled cheesecake from the base of the springform pan and then gently pulling on the parchment paper base to slide the cheesecake onto the cake plate. Using a sharp knife, slice the cheesecake into servings, wiping the knife clean between slices. Serve with fresh strawberries or another berry of choice. Enjoy!
Notes
The equipment section above contains affiliate links to products I use or recommend.
Freezing a cheesecake: After the cheesecake has baked and is ready to be removed from the oven set it on the counter to cool completely. Once cooled, place it in the refrigerator to chill for at least 4 hours but preferably overnight. Slice it or leave it whole. Once the cheesecake has chilled remove the outer rim from the springform pan. If you'd like, cut the cheesecake into portions or simply leave it whole. The cheesecake can remain on the springform pan base or grab the edge of the parchment paper underneath the cheesecake to carefully slide it onto a round cardboard base. Wrap it well in plastic wrap, then foil. The less air comes into contact with the cheesecake, the longer it will last in the freezer. If the cheesecake is sliced into pieces, be sure to wrap each individual slice with plastic wrap and aluminum foil. Freeze for up to 1 month.
- Category: Dessert
- Method: Bake
- Cuisine: American
- Diet: Gluten Free
Update Notes: This post was originally published in May 2016, but was re-published with updated step-by-step instructions, pictures, tips, and FAQs in October 2021.
Disclaimer: All brand recommendations are purely my own opinion. I am in no way sponsored or compensated by the brands mentioned in this post for my recommendations. This post may also contain affiliate links from which I may receive a small commission (without any additional costs to you). The money earned from these commissions helps me to maintain this website. Thank you for your support!
Darlene says
Hi, Shannon. I was given a recipe very similar to this one, but I have misplaced it. The big difference is it called for 1/4 cup Kahlua. Do you think the added liquid would work in this recipe? Any suggestions before I make it adding the Kahlua?
Shannon Emery says
Hi Darlene! I’ve never tried putting Kahlua in this cheesecake but I think it would be amazing! I don’t think adding a 1/4 cup would have any negative impact on the cheesecake filling (other than being really tasty!) so I would say just go for it, but again it’s hard for me to truly offer a helpful suggestion without having tried it myself. I’d love to hear how it turns out if you try it!
Phoebe says
I want to try this. Unfortunately, none of the stores in my area have the Red Hill brownie mix. I’m going to try another GF brand but they don’t come in 21 oz just 16-17 oz pkg. do you think I should adjust the oil & egg amt.?
Shannon Emery says
Hi Phoebe, thank you for your question. I honestly don't feel comfortable providing you with an answer without testing it first with the specific brownie mix that you are planning on using. Every gluten-free brownie mix is a little different, particularly with the blend of gluten-free flours that are used, so it's hard for me to say how I would adjust the oil and egg without trying it myself first. My best suggestion is to order the brownie mix I suggest in this recipe on Amazon if you are able to. I provide a link to it in the recipe if you are interested. Or you could also follow the measurements suggested in the brownie recipe on the back of your brownie mix. That would probably be your best solution if you are unable to use the Bob's Red Mill GF Brownie Mix.
Carolyn Clark says
I must be the only person reading this 10 times and still don't get it! You direct the baking of the brownie mix base, but then before it's seemingly done, to pour the cheese cake mixture on top and back another hour!? Really? Wouldn't it be better to bake the brownie crust, remove it, and then bake the cheese cake mixture in the same springform pan?
Shannon Emery says
That's correct Carolyn! Please bake the brownie base and then pour the cheescake mixture over the top and cook another hour. If you follow the instructions as written it will turn out great. Definitely DO NOT remove the brownie crust and then bake the cheescake mixture seperately. I hope you enjoy!
Lori says
Can you freeze this cheesecake? I want to make it for Thanksgiving but I have too much going on the few days before Thanksgiving to make it.
Shannon Emery says
Hi Lori! Yes, you can freeze this cheesecake. But first you’ll want to make sure that you allow the cheesecake to cool to room temperature followed by thoroughly chilling it in the refrigerator before you place it in the freezer. Then be sure to allow it to thaw in the fridge overnight the day before you plan to serve it. I hope you and your Thanksgiving guests love it!
Lori says
Thx! Do I freeze it in the spring form pan or take it out? How would I wrap it or cover it?
Shannon Emery says
After you've allowed the cheesecake to thoroughly chill in the refrigerator, remove the springform pan's outer rim. You can leave the cheescake on the springform's base unless you need to use it, in which case transfer the cheesecake to the dish you plan to serve it on or to a cardboard cake base. Then wrap the whole cake with plastic wrap and then wrap with a second layer of aluminum foil. Let me know if you have any other questions!
Ann says
I really like cooking sweets and cakes. Cheesecakes are my weak spot. Not because they are difficult to cook or it is not easy for me, but because I can eat a half of this beautiful cheesecake in 10 minutes 😀 I tried cheesecakes with many different stuffings, but chocolate is always a good and universal idea. Thank you for the recipe, it really looks very delicious. I'm sure, these appetizing photos will attract many sweet teeth as me))) Love your blog, keep it up!
Shannon Emery says
Thank you Ann! I'm so glad to hear you are loving the recipes on Pass Me Some Tasty! ❤️